
Reproduction Parts for 1916-1964 Chevrolet Passenger Cars & 1918-1987 Chevrolet & GMC Trucks SHOP ONLINE | ONLINE CATALOG | ABOUT US

@harry-truppner Harry, yes I think one side at a time is best. I have been researching and the internet AI (which I don't fully trust) says to only unbolt one side at a time. To me that is a recipe for twisting the body. However I would unbolt both sides then just lift one at a time.
I’m reminded of replacing sills on a building. I have done that a few times. You remove all the interior and exterior finishes at the bottom of the wall then bolt a beam (called a whaling board) to the studs. You lift that beam slightly and pull out the old sill then slide in the new one. If the studs are punky at the bottom you cut them back and add another layer of sill. Funny that seems easy. I once lifted one side of my garage and poured a new 10 inch short foundation on the slab. Then replaced the sill and reconnected the studs and re sheathed the outside, all on a weekend. That was easy… the job on this car scares the crap out of me!
I will do more research as has been suggested here. Maybe I’m making too much of this. I did talk to one guy who really tried to help but his situation is very different he’s doing this on a truck that used to be a car and the body is off the frame and on a dolly.
Thanks all for the encouragement and support!
Rich

On the side you are not working on I would leave the bolts in place with the nuts backed off
7472 old site post

The body factory assembled the wood frame in a jig to glue, screw and bolt together. The the sheet metal pieces were then installed. On "Closed" cars the back corners were spot welded to secure the main body panels (side and back) on the wood frame and then the seams leaded. The cowl section was slid onto the front of the main sill and secured. Nails on the rest of the metal to the wood. That process can be duplicated but at least one side needs to be separated from the back panel and welded back together.
For clarity some sills in that time period were single piece and others laminated. I think they were based on what was available when the sills were made. I have found oak in the main sills in the majority of cases. Not that white ash or a few others are not also good choices. The advantage of laminated sills is they can be made with shorter lengths and offset joints. With modern waterproof glue or adhesives being stronger than the wood the result will be stronger than the factory parts.
If you decide to replace wood without disassembling the sheet metal it just requires a few deviations from the factory process. Since the rear woos section over the rear axle is bolted and glued that permits the sills to be slid into the front cowl brackets/braces. The door posts (A, B, C pillars) were installed onto the exterior side of the sill before the sheet metal was installed and glued, screwed or bolted to the sill from the outside. It can be done from the inside instead. Using pocket screws or through bolts. Nuts, and other embedded threaded metal parts attached to the pillars. Some of those were used on open bodied cars and trucks. A little ingenuity and planning can make the job much easier particularly when only replacing or repairing the damaged original wood.
How sweet the roar of a Chevy four
Participant on Chatter since 11/22/2001
19758 posts on the former Chatter site
@stovebolt-6 I am not a master carpenter but I have replaced a main beam sill on a 1840 Cape style home and I made the wood for one door on my 32. After reading your post I don't think you will have any major issues on repairing the sill on your car. In my opinion it will be much easier than replacing a house sill. Whether your sills are laminated or not I would make the repair section laminated so you can make offset lap joints.
7472 old site post
@steve-d That is a good Idea. I was going o just pit some pins in the holes to keep the body form shifting. My big issue is where to jack the body from? With the floor out and the sill needing to come out… once you remove all of the stuff the get the body off theres no where to put the jacks.
@steve-d I have some full 1 inch thickness oak that my FIL has had for some time stored dry. I plan to cut it a bit over sized. Then run them through the planer to get all three layers to about 5/8s that should give me the 1 3/4 I need once they are glued and screwed together. I am going to try to replace the front sill only with writhe a spline or a log lap joint.
I spent this am bracing the car with 2x4 lumber. I I have a 2x4 bolted through the rear fender holes and then I drilled and bolted the front ot the floor framing inside the cowl. The boards are secured to the A and B pillar by 2x4 spacers and those are all screwed together with structural framing screws.
I putt a cross piece in the cowl between the long 2x4s and I have cross braced the doors also off of these long front to back 2x4s. I need to put some cross bracing between the b pillars and I think that will hold the body straight while I figure out where to jack.
I can put a jack under the rear sill in the rears wheel well. I think I can put a jack under the cross piece i put in the cowl. That cross piece is a 2x6 on the flat. I only plan to raise the body enough to get the sill out. Hopefully only about 2.5 inches. It si slow going as I am trying to be very careful. I have a lot invested in this car already.
Thanks for the advice!
Rich
@chip Chip, Thanks for the encouragement. I did get as copy of the Fischer Body assembly manual. It is extremely helpful. I plan to only cut out the bad sections and either lap or spline the new section in. I would replace the whole thing except the “glued” part of the rear sill to the wood on the back of the body makes me anxious. IDK how I would get that part without serious disassembly.
Right now the car looks like a jenga puzzle with all the 2x4s going in every direction. I am more comfortable doing this kind of work on a metal car. It is a mystery to me as to whether my bracing is enough. Also I am anxious about the lifting points. There’s not much on the bottom of the body to lift from when you consider the sills need to come out.
I will proceed very cautiously.
Rich
@stovebolt-6 When I lifted my body I did so with the doors on and a 2x6 thru the window opening. I do have an overhead rolling chainfall. If I remember right I also used my engine lift with a 2x6 thru the rear window opening to lift front and rear at the same time. My thoughts are that it would be much easier and just as sturdy to use two pieces of equal thickness.
7472 old site post

Hello Stovebolt 6,
Hows about jacking the body up by the wood headers that form the upper horizontal wood coachwork to roof of the car. The pillars to header joints should be strong/solid enough to support the wood coachwork and metal exterior body. That way you can raise everything up enough to do work and not have jacks anywhere near the sills. The sills might be stuck on the frame that it has been resting on for all these years, so care while jacking and verifying sill/frame separation is needed.
@steve-d I thought about raising the body through the windows but I wasn't sure that the roof framing would hold the weight of the body. My windows are all in place. I was able to slide a thin wide putty knife between the frame and the splash apron to free it up for removal. I can do the same for the rest of the sill before lifting.
I noticed the other day while removing the bolts due the cowl frame that the cowl windlace wire comes through the cowl and wraps around the sill. Removing all the bolts in the cowl frame was no fun. I’m replacing those square nuts with hex nuts for sure. I think I saw a tech article on mounting the windlace on the Filling Station page. I will have to review that as well.
Thanks for all the advice.
Rich
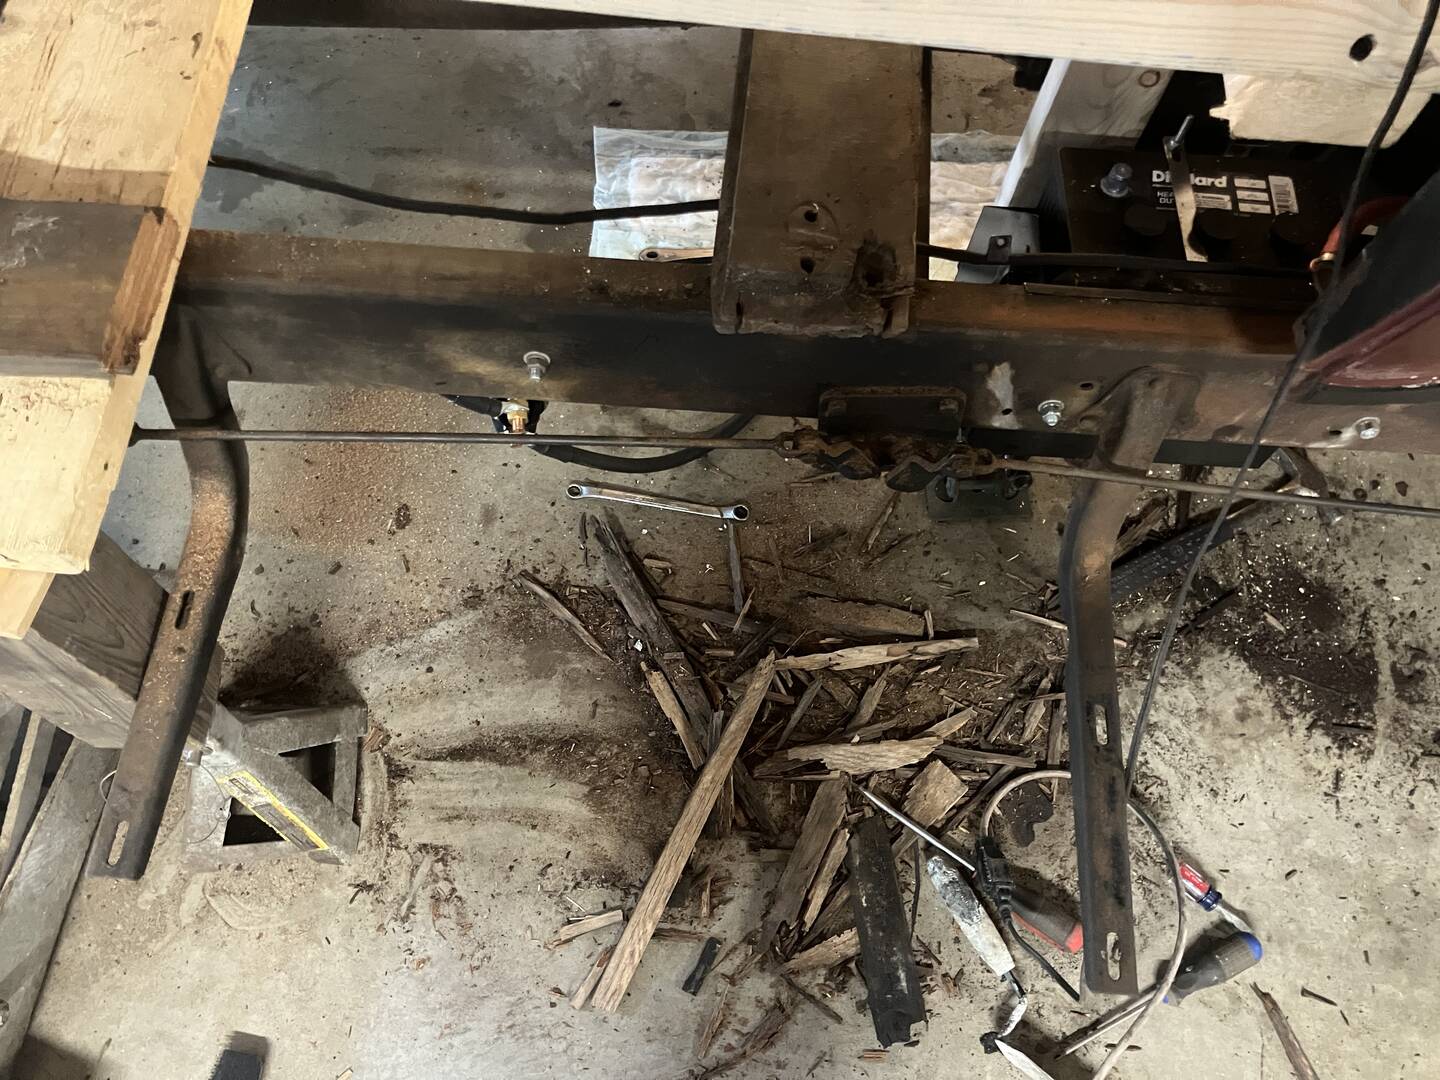
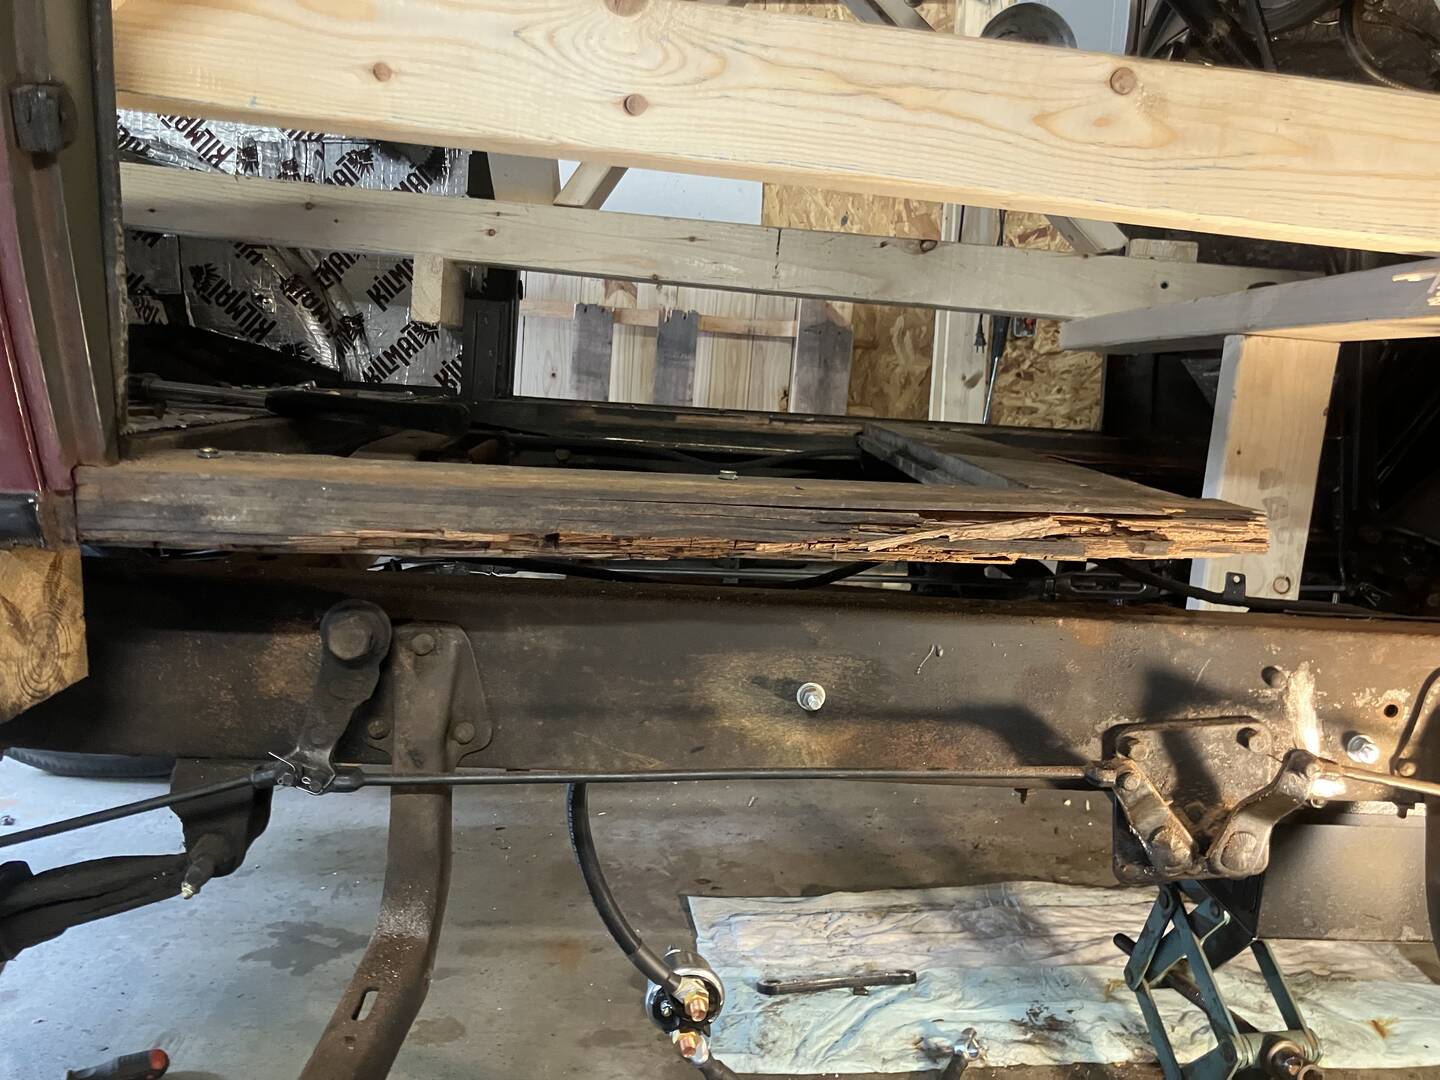
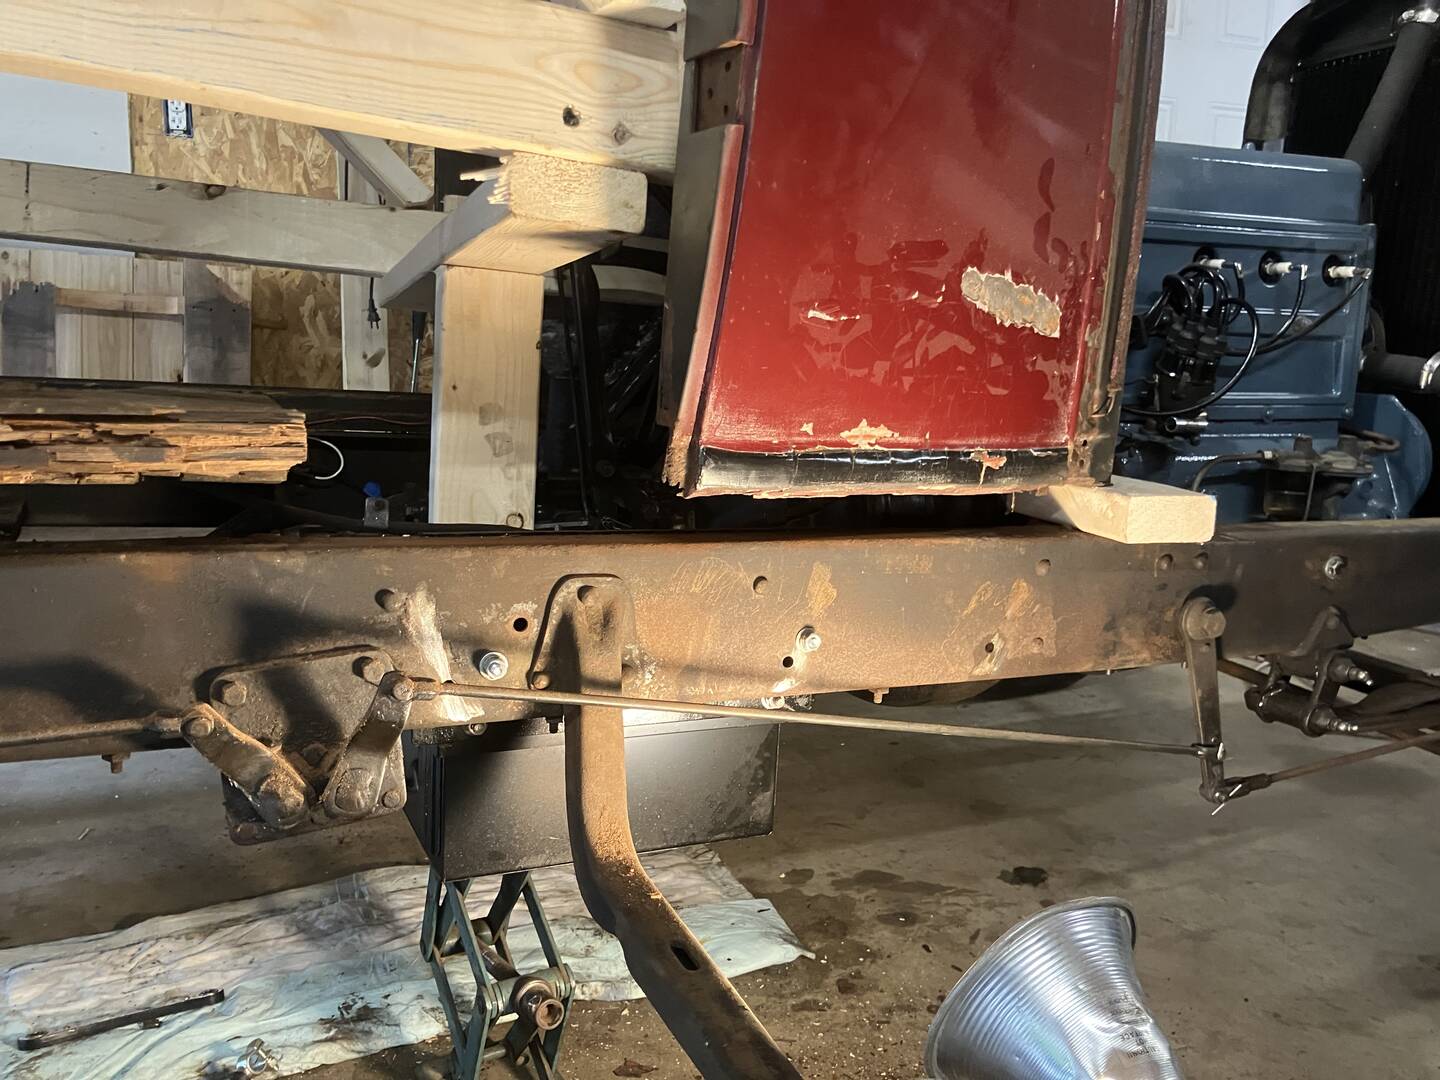
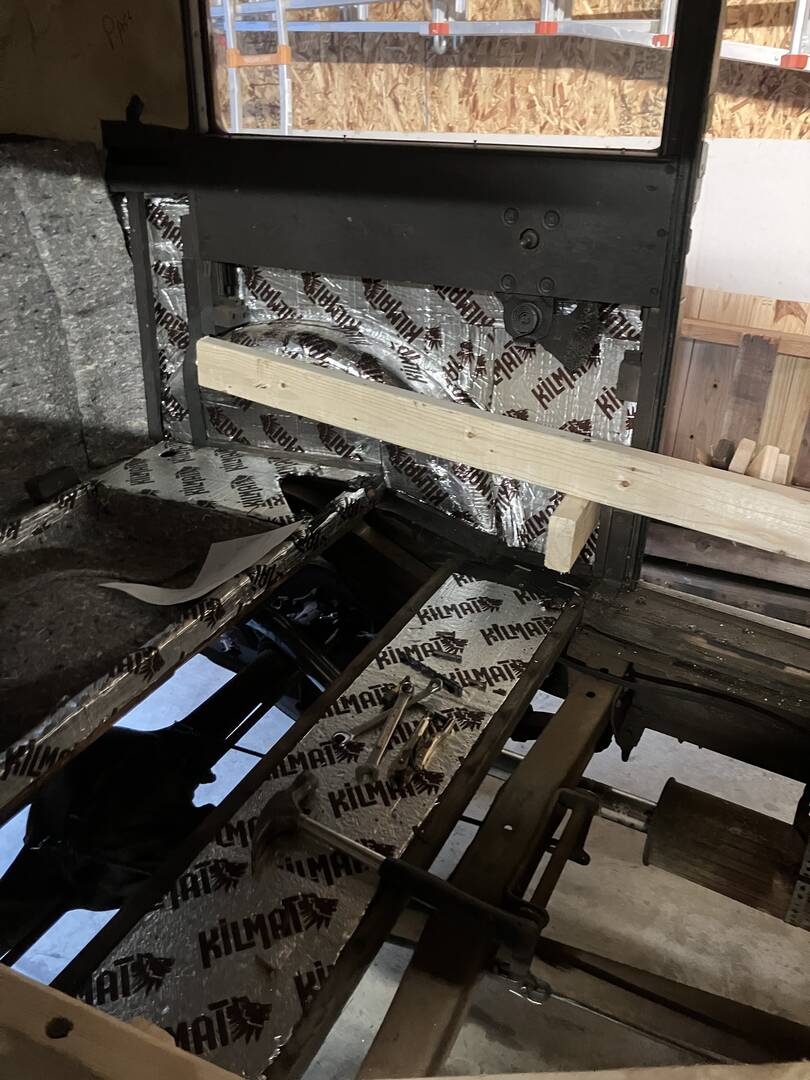
Progress update: please don’t laugh too hard at my jenga bracing for the sill removal. So far it is working. It’s a bit cumbersome and probably overkill but the body measurements are all good so far. I have the passenger sill removed back to the solid parts. I have a template made for the replacement and I have blanks cut to make permanent sills from white oak. I need to do some fairly serious metal repair on the rockers, splash aprons and cowls but I expected that.
Tomorrow I will have my FIL plane the boards to the correct flatness and thickness. I think I may be using only 2 layers which is good as the current sill is also 2 layers. The boards I have are pretty straight and flat and 2 make up a full 2 inches. Hoping that will make the scarf joint easier. Here are some pics of the progress.
The sill is cut back further than the pics show. I can make a scarf joint of about 6 inches. I wanted more but it’s what I have. What a puzzle getting the sill out. More nails and screws and bolts and wires than expected. But i will keep moving forward slowly but surely. There is (as expected) some poor work done on the passenger side sheet metal. Someone pop riveted some new steel on the cowl and put a ton of bondo on it to make it look right. I thought about this but would never do it. More to come.
For tonight it is blocked up for stability. I am hoping to get this knocked out in about a week… depending on how my metal skills hold up… I am a bit rusty.
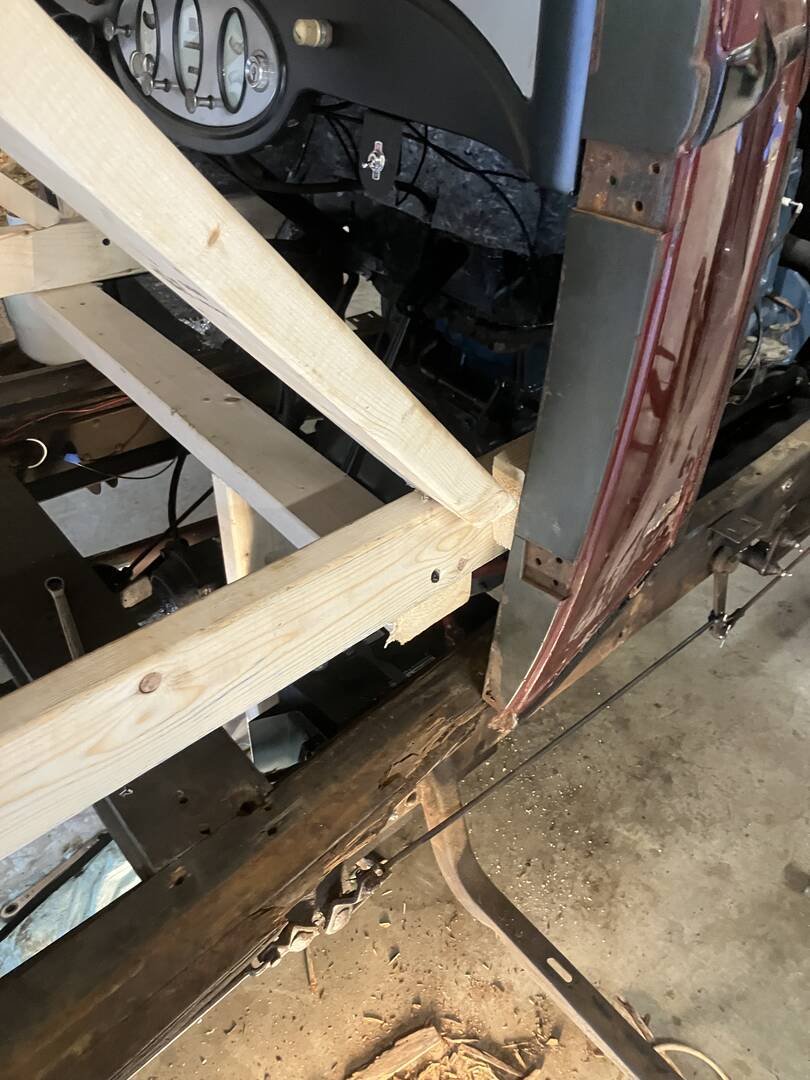
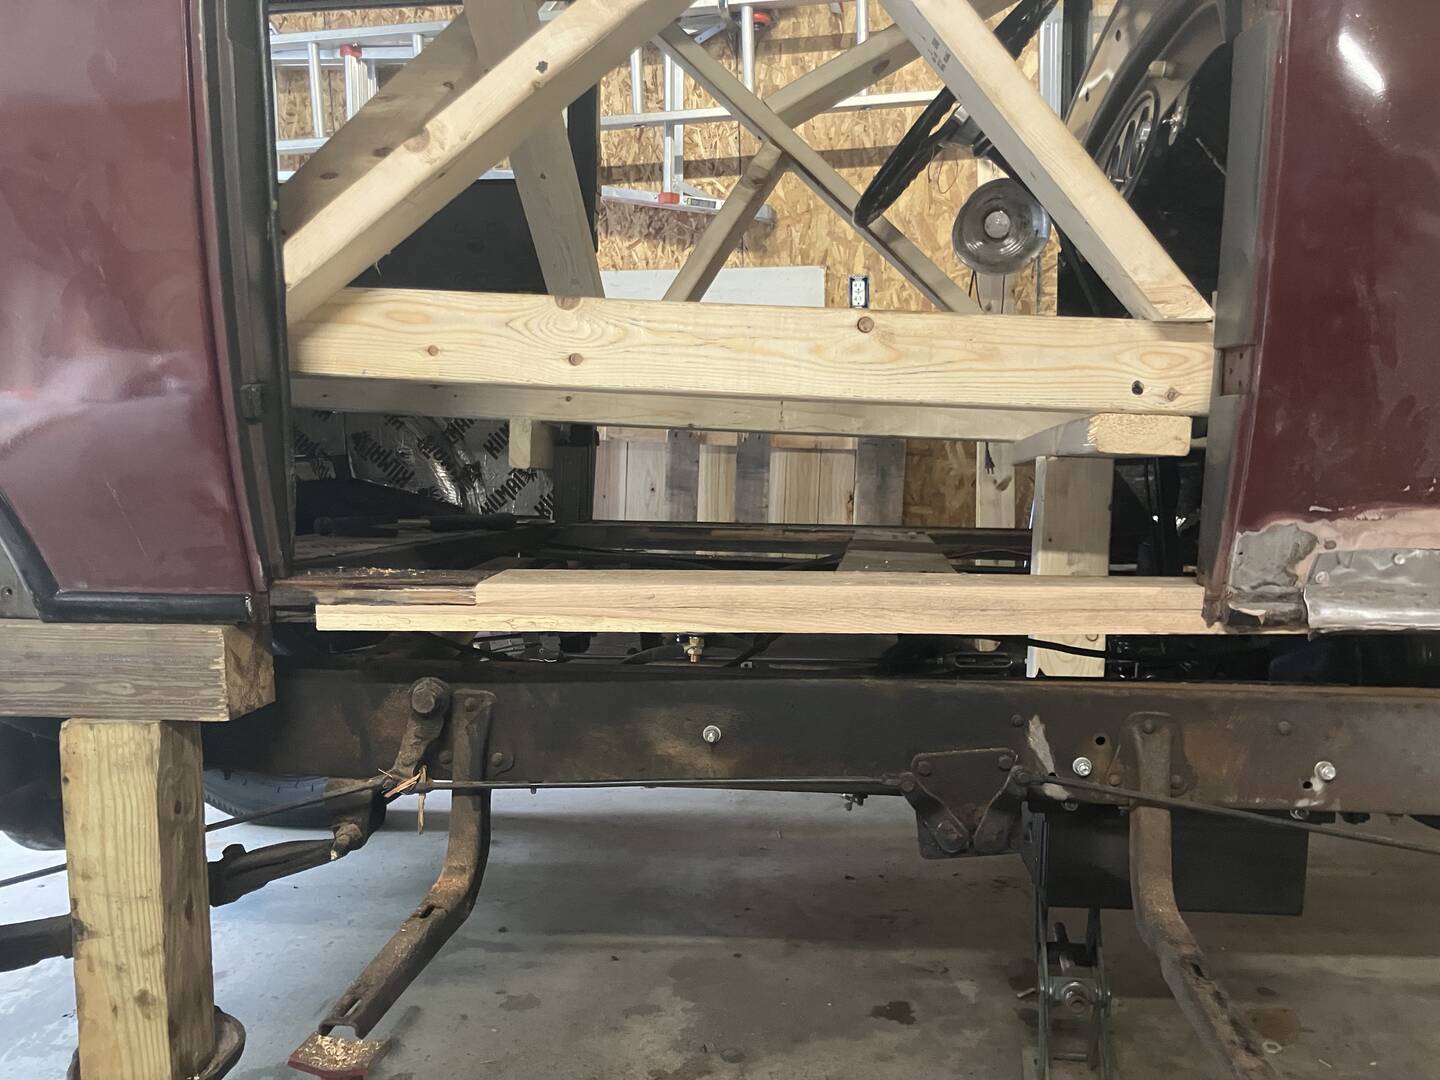
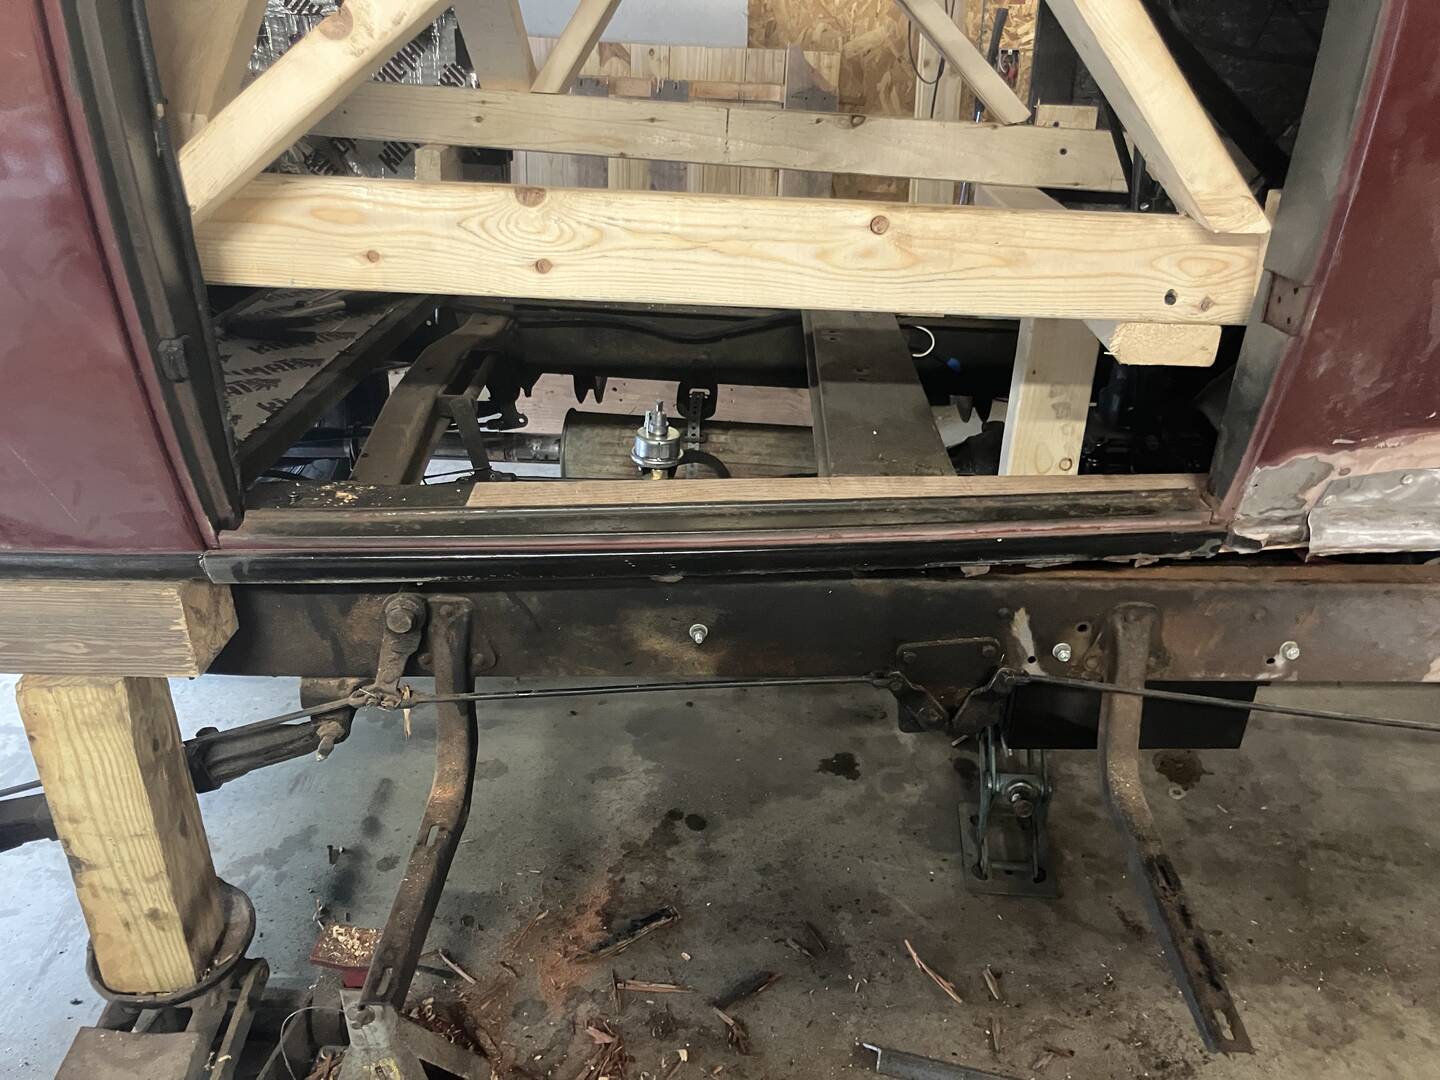
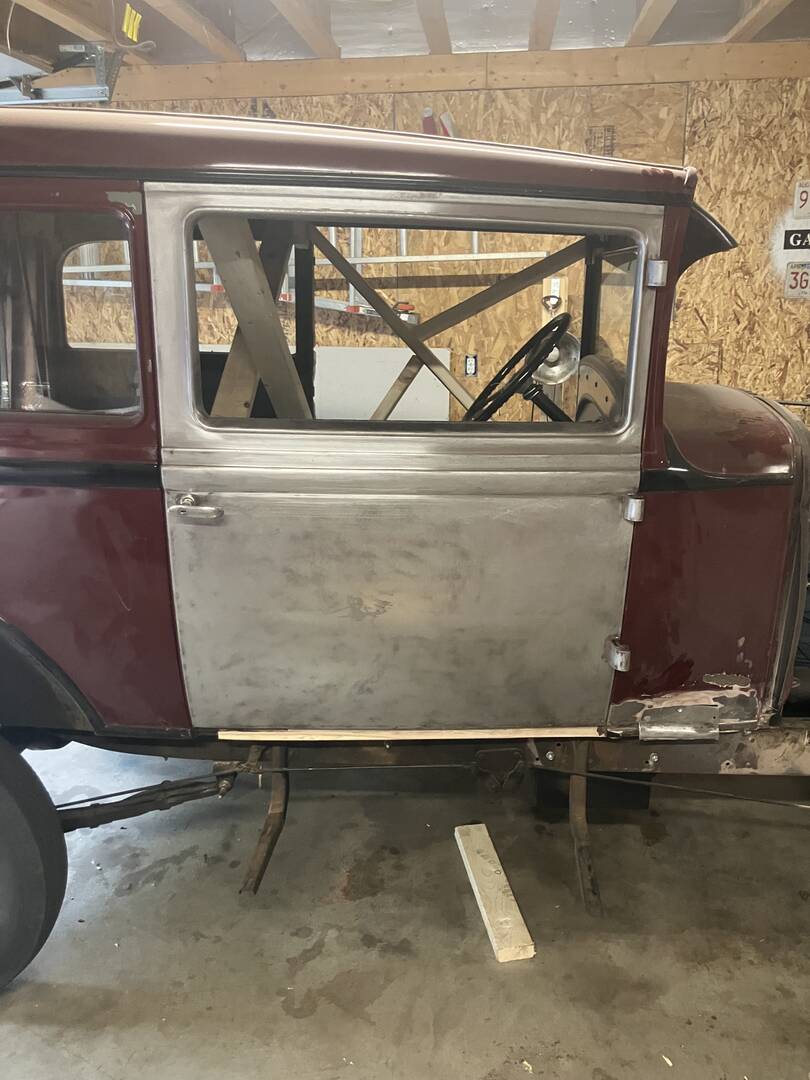
I got one side (the worst side) of the sills almost done. These pics are a dry fit of the new sill and the door. The door fits nicely and works well. I will take it apart tomorrow and do some fine tuning of the sill and then glue and screw it permanently. I still have to do some work on the hinge pillar. Then it’s on to the other side. I will say I have lost some sleep over this project. I was so relieved when the door went back on and fit as good as it did before.
I do think my doors need a little tweaking. The gap at the top in the front on both door is kinda tight. I remember doing that on my 53… what a tedious job adjusting the hinges. Here’s re some pics of the progress.

Looks good. Don't stress too much over the door fitment. Fit & finish wasn't very important back then. You should have seen the gaps on my 38. Wow.
7046 old site posts
Save a life, adopt a senior shelter pet
There are many good people. If you can't find one, be one.
1938 Master Business Coupe-Sold, now living in New Jersey
1953 210 Sedan
@tiny Yes, I remember on my 53 when I took all the measurements before replacing the bottom of the cab. I was surprised that the door opening on one side was 3/8 wider than the other side. Also the hood gap where it meets the cowl is like an inch but the rest of the hood looks great.