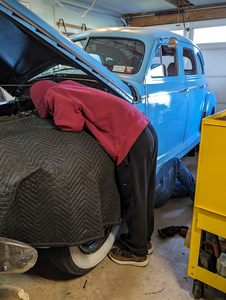
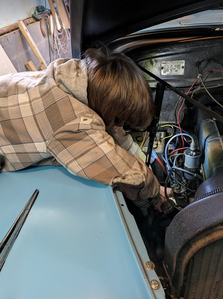
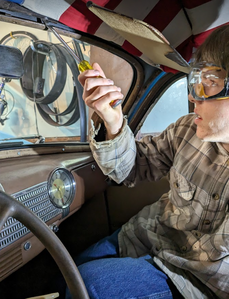
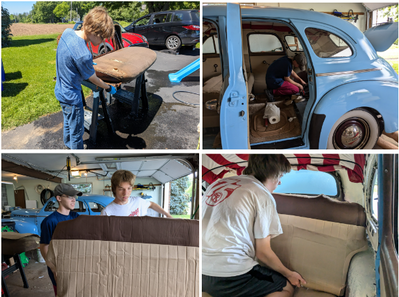
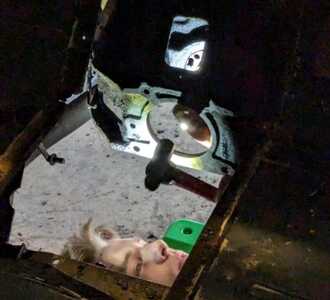
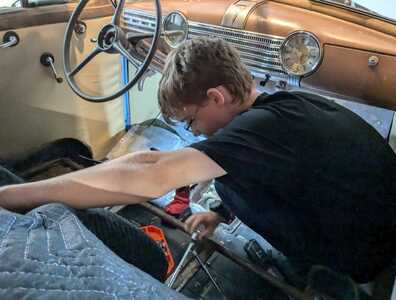
This is a continuation of the 1941 Father Sons project thread that was started on the old version of the forum. June 2018 purchased a car that was sitting for several yeas to rebuild as a fun car with my sons. This is not a show car but for us to enjoy. Anything we do to the car that is not original has a goal of being done in a way that can be undone if the next owner did want to restore it. In the years since we started this they have grown up allot. I am glad that we have documented this process over time and taken pictures of many of the days we were working on the car. As of today the document I have for this has reached over 70 pages, not all posted here. One day I hope to print this and give them each a copy. To me the memories are worth far more that the car ever could be. That was the goal and I am glad it is continuing to be met.
March 2024
Received a new old stock set of post and bushings for the shift linkage. We replaced the linkage post and bushing for reverse and first. The one for second and third was dry but not at all worn. Lubed and oiled everything on the car. Took it for the first drive of the year. Shifted the best it ever has. I had thought for some time that older cars may not have shifted as well or it was me just being out of practice. Apparently it was a case of severely worn bushings. Glad that we could start the year needing what seems to have been minimal work. to get on the road.
Easter 2024
Took the car out for the first real drive of the year to Easter sunrise service. Had no issues at all. Did find that the headlights are not properly aimed. They were adequate when the high beams were on but the low beams the passenger aimed to low. Did find that running the fog lights with the headlights would cause the breaker in the switch to trip. That was a little nerve racking at 5:30 AM on a road with no lights and few markings. It reset and there were no issues using the headlights only. First time we had ever tried running the fogs other than to see if they worked. Something to fix later. Should be on different circuits. Started out in the 30s and drove home no issue with it being about 39 out.
Later that day we mounted the trim around the front windshield and started making some other interior panels. The interior is being created as we go. We know it is not how it was done back then but nothing is being done that cannot be undone if it is restored in the future. Main goal is still to make it our project and to enjoy it.
Hilton, New York
1941 Chevrolet Master Deluxe
1987 Monte Carlo LS
2001 Chrysler Sebring Convertible
I like what you are doing especially including the younger generation my children werent that interested in cars of any vintage if they couldnt drive it immediately though 1 did help tidy the paint work. Keep up with the good work.
Tony
As time has gone on my oldest far prefers to do the interior and paint. Youngest prefers to do electrical and mechanical. Each are leans towards their talents. One part that they did not like when we started but now have now issue with and keep up with is documentation. When we took the car apart it was a bag it and tag it program. Received allot of questions about why we were doing this when we would replace the hardware anyways. They understood as things started to be put back together. Also the trips to a store where I could matchup an old nut or bolt with the replacement made them understand the value.
We bought the shop manual and in the rear of it the notes page is filled with a list of what color we replaced each wire with. We made our own wiring harnesses for the car. We had to add pages to the back of the manual for some of the notes. Everything from turn signal instructions to hand drawn wire diagrams have been stapled to it. They have learned the value of the documentation.
The goal of this project was to spend time together and that cannot be replaced. The project has exceeded every goal I had for it. The value is not in the car but the memories.
Hilton, New York
1941 Chevrolet Master Deluxe
1987 Monte Carlo LS
2001 Chrysler Sebring Convertible
Really interesting topic. Have been following from the beginning.
I look forward to every episode of this ongoing series of posts.
Dick
935 Old site posts
April 2024
Changed the oil, cleaned and oiled the air filter. Youngest was surprised that the instructions on the filter said to clean in gas and use motor oil on it. Had to explain that when I was a kid we used gas as a solvent to clean a lot of things. I had forgotten how that is not a common practice anymore. Also installed a new clutch return spring. Not sure what happened to the one that was on the car or if it was ever there since we started working on it. Last season we noticed that the clutch pedal was not returning to the normal position all of the time. After adding the new spring it is now higher. Surprisingly we were able to look up the NAPA part number in a NAPA parts book from the fifties. When we called NAPA they were able to find the part and order it. Since it was a custom order we had to get two since that is how they are packaged.
Hilton, New York
1941 Chevrolet Master Deluxe
1987 Monte Carlo LS
2001 Chrysler Sebring Convertible
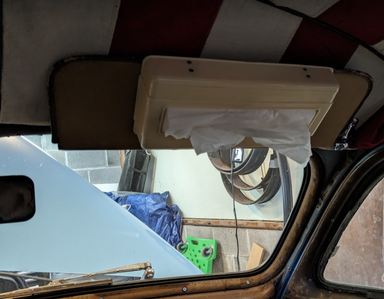
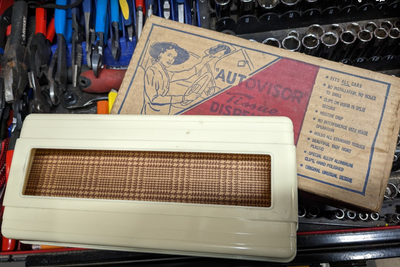
Not much done to the car in the last few days. Spent a day and a half performing the yearly spring cleaning of the garage. Only thing we did do to the car was to install a tissue dispenser that was found new in the box with the parts that came with the car. Not sure what year it is from.
Hilton, New York
1941 Chevrolet Master Deluxe
1987 Monte Carlo LS
2001 Chrysler Sebring Convertible
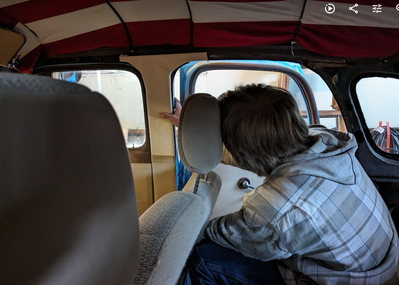
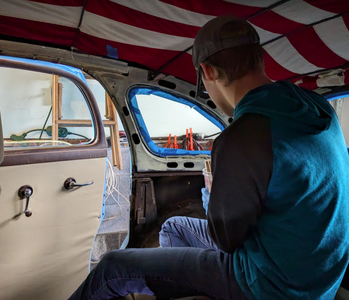
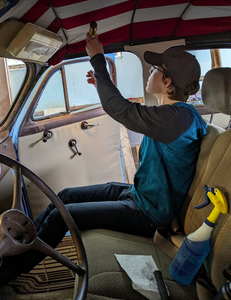
Knowing that the interior is taking far longer than we expected and that we are entering the time when we would rather be riding than working my oldest decided to paint the uncovered areas to match the color of the interior. Found that the Rustoleum Almond closely matches the fabric we will be using for the upper portion. First he found several staples from the old interior that had to be removed. He masked the area off and painted it. Let it dry and then added a coat. Not as good as the interior panels will be but far better than the metal that did not match anything. The lighter color makes it look better. Definitely one of those little task that while not needing to be done make what has been done look that much better.
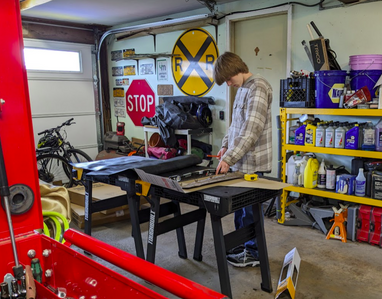
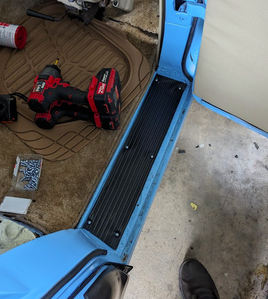
While my oldest was painting the interior my youngest and I made mats to be attached below the doors of the car where one steps in. The section of the floor under the doors had been patched by a prior owner on one. The drivers was dented and the others were definitely not in the best shape cosmetically. When painting the car they were painted and did match but we thought it could be better. With the parts for the car there was a cover that fit one of the rears but the rubber on it was hardened and brittle. To make our own we sandwiched a piece of galvanized steel between two pieces of rubber cut from a runner used to protect carpet. Used some contact cement to hold it together. Then screwed them to the car. Looks better than before they were there. Time will tell if they hold up.
Hilton, New York
1941 Chevrolet Master Deluxe
1987 Monte Carlo LS
2001 Chrysler Sebring Convertible
We have been driving more than working on the car. Here is the latest update:
June / July 2024
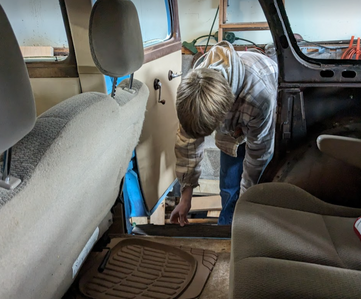
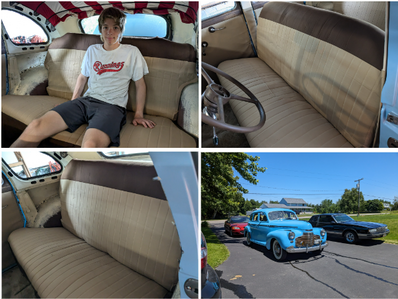
Sons removed the seats that were installed. Temporarily we had replaced the original seats with mini van seats. The original seats were badly damaged and beyond our knowhow to reupholster. Also at the start this was a better plan to get the car to a driving state. As for the old seats, pressure washing, shampooing and then letting the cushions in the sun to dry helped to clean up the old seats. Used some foam from old couch cushions to fill the gaps where the mice had eaten the rear upper seat. Then covered the seat cushions with seat covers. Placed the rear seat back into the car. Next we mounted the frame for the front seat and installed the cousins into it.
Rewired the fog lights so that they are on their own circuit. Using a relay and inline fuse they now pull their power directly from the battery. My youngest son did the wiring while I watched. Once again we updated all of the wiring documentation in the service manual to match what has been done to our car. All of the wire colors we have used have been recorded there.
Hilton, New York
1941 Chevrolet Master Deluxe
1987 Monte Carlo LS
2001 Chrysler Sebring Convertible
I absolutely love the fact that your sons are as excited with the project as you are. You are giving them memories they'll carry with them the rest of their lives.
7046 old site posts
Save a life, adopt a senior shelter pet
1938 Master Business Coupe
1953 210 Sedan
@timothy-kruger I love to see stories like this one, where the family works on it together. Nice looking project
I know some of the following is covered in a different thread but below are the current updates to the notes I have been keeping on the car. I printed a set for my parents and aunt the other day. They thought it was great that there was a record with all of the pictures. They enjoyed that everything was dated and they could see the boys grow up over time. I thought the book would be valuable when I stated it when the car arrived but had no idea it would become this much more valuable than the car one day.
July 2024
Took a ride with my oldest son down the parkway to try out the new seats. The front seat proved to be more comfortable than the old van seats. After about 25 miles we turned around to come home. This is where the trouble started. Put the clutch down to shift and it decided to stay on the floor. We could put the car in any gear we wanted but the clutch remained on the floor. I kicked it and it still stayed on the floor. Coasted to the side of the parkway and called AAA for a tow. After an hour and a half of weighting the clutch popped back up. Unfortunately it did not feel right pushing it back down and it was catching as it came back up. Also somehow we lost a quart of oil over 25 miles. Decided to continue to wait for a tow. At about 8:30 PM they finally came and got us. At least it was a quiet place to break down.
With help from the VCCA and friends it appears that the oil leak and the clutch failure are unrelated. It appears that the throw-out bearing has failed. Looking at the engine we can see leaks out of the rod cover on the side of the engine. Below that the oil pan looks to either be leaking or covered by what is leaking from the rod cover above. The rear main seal also appears to have a leak. Needless to say we are losing oil.
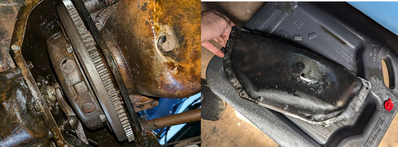
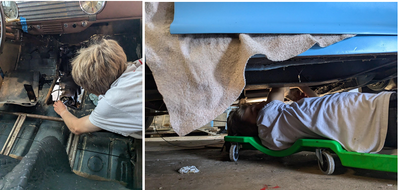
My youngest removed the cover under the flywheel to have a look. It had oil in it but the pressure plate appeared dry. The clutch adjustment looked ok and the throwout bearing was not riding on the pressure plate fingers. He slipped some paper in between to be sure. Next he cleaned up alot of oil to make the job easier.
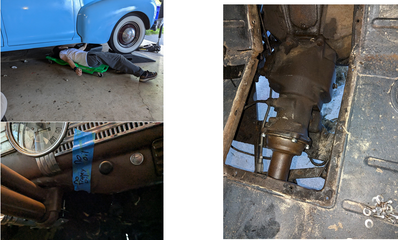
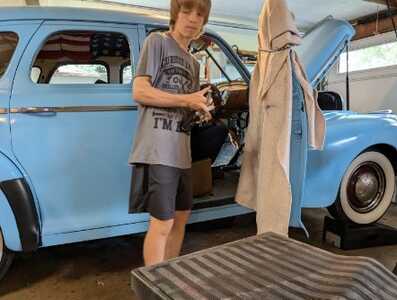
Next day my oldest and I removed the front seat cushion and carpet from the car. Then removed the cover over the transmission to gain access. He then checked the level of the tranny oil to see if any of that was lost since the beginning of the year. Good news was it was at an acceptable level. Drained the tranny oil and motor oil. Finally placed a piece of tape over the ignition listing the empty fluids.
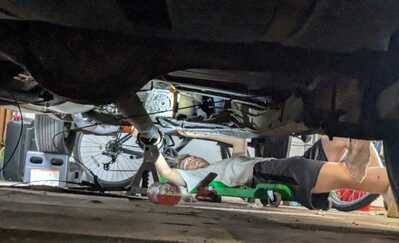
Youngest and I disconnected the torque tube from the transmission and lowered it out of the way. It is supported by a jack stand just below the cross member that supports the tranny. Remove the speedometer cable connection and disconnected the shift linkage. Eight bolts and the transmission will be ready to lift out. The shop manual references using guide tools while removing it. We plan to make these but need to get some threaded rod or really long bolts first. Most of the items over the last few days have been the boys doing the work while I directed and did research on the steps on how to do the work. They are learning to use the tools well.
Hilton, New York
1941 Chevrolet Master Deluxe
1987 Monte Carlo LS
2001 Chrysler Sebring Convertible
August 2024
Transmission is out of the car. For the removal tools we cut some grade eight bolts. Had a lot of issues getting the transmission out. We started by following the instructions in the shop manual. It started by removing the rear four bolts on the mount and then the front ones. Every time we attempted to lift it out it was a ½ inch too long to fit out of the floor. After a few hours of fighting it we finally thought about removing the mount. It came right out without the mount on it. Lesson learned that the book may assume we know what we are doing, we proved it wrong that day.
Took the flywheel out today. After getting all of the bolts out the boys decided it was best to have one hold it while the other attempted to get it off. It was fairly tight. They tapped it with a dead blow hammer till it came off. They did it without dropping it. Unfortunately at this point we were able to confirm that the rear main seal was leaking. Oil was everywhere. Checked the flywheel with a straightedge and feeler gauges. It was not warped, looks to be in great shape.
Youngest son removed the pilot bearing. Found that the one that was in there could have been the original. It was a roller bearing, not the newer brass bushing used after 1946. One of the post on the bearing had Made in USA stamped on it further supporting that this could have been original to the car. Unfortunately since the tool we bought for this task bent while removing the bearing the job was much harder than it should have been. Once again a lesson that even if it is a one time use tool we should not have bought the cheapest one.
Youngest removed all of the bolts and screws from the oil pan. Unfortunately we found it was frozen to the engine block. Attempted hitting it with a mallet, using a putty knife to pry it off etc. Nothing worked. Sprayed down the seam with WD-40 thinking maybe it will work. Ordered a tool to help remove the pan, it should arrive in a day or two. The oil pan gasket is leaking and it has to be removed to replace the rear main seal. I hope we can get it out without damaging it.
Wanting to have some type of success for the day we installed the pilot bushing. Nice to end a day on a success even if it was not on the todo list for the day. Ended the day cleaning all of the tools that we had used since taking the tranny out. We saw that this was going to be messy and the same sizes were going to be used over and over. We just kept them all together in one spot and decided to clean them all at once at a later point. Normally all of the tools are cleaned and put away at the end of each day but this just made more sense. The boys also each have their own sets now so if we needed to work on something else there was a clean set ready to go.
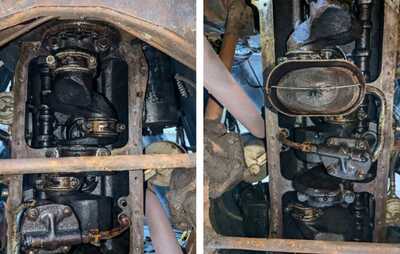
With the help of a new gasket separator tool we were able to get the oil pan off. The Lisle tool worked great. My youngest was able to wedge it into the gap between the pan and the block. There is a handle to hold onto the tool while taping it with a mallet. The edge of the tool has a blade on it to cut the old gasket off as it is taped with the hammer. The pan did not have any metal pieces in it and very little gunk. The bottom end looked clean for the age of the engine.
Hilton, New York
1941 Chevrolet Master Deluxe
1987 Monte Carlo LS
2001 Chrysler Sebring Convertible
September - October 2024
Work has ground to a slow pace. Both of my sons are back in school, one is in sports and the other looking at colleges. With a rule that at least one of them must be there to work on this, it seems that a few hours on Saturday each week is what we have to work on it. Main thing is that we are still moving forward to a goal of getting it running. We do have to keep focus on the priorities of school and future goals like college.
Due to the excessive amount of oil everywhere it is clear the rear main seal was leaking. Also the old one was visibly disintegrating. Purchased a Sneaky Pete tool to remove and install a new rear main seal in the engine. Did this based on a part number from a YouTube video we saw on how to do this job. The old one came out easily, in pieces. Could have pushed it out with a wire and not used the tool if we wanted to. Next came the issues. Bought a Fel-Pro seal kit. Quickly found out that the included Fel-Pro rope seal’s diameter was too large. Ordered a new Best gasket seal from Chevs of the 40s.
New seal arrived. Naturally the gap to install to seal was too small. So we lowered the crank 1 ½ turns on the bolts per the video instructions. Not able to get the seal in, not enough space. Posted for help on the VCCA forum. They had advice to lower the bolts 3-4 turns out. Still had issues. The Sneaky Pete tool’s handle broke so we looped the wire around a wrench. Now it would start into the channel and then slip off shredding the tip of the seal in the process. Something was clearly not correct. We were following all of the advice from the forum and friends.
A relative of mine kept calling them a Chinese Finger Trap tool. But the one we had did not look like a Chinese finger trap. We had the part number of the tool that the video mentioned. Unfortunately the videos did not clearly show the tool, just someone using it. With no clue what we were doing wrong my oldest and I started watching YouTube. Saw a video of someone working on a pickup with the same issue. That guy mentioned the part number and then stated that they changed the tool but not the number!. In the video he mentioned getting a NOS copy of the original tool and that worked great. On eBay we found the original NOS version. This worked great. In 10 minutes my Youngest had the upper seal in. I did not even have time to get under the car and get a picture. Ran all of the crank bolts back up, cleaned up the tools and called it a night. Next steps are to trim the upper seal, install the lower and re torque all of the carrier bolts.
Hilton, New York
1941 Chevrolet Master Deluxe
1987 Monte Carlo LS
2001 Chrysler Sebring Convertible
Tenacity is what it takes sometimes. Good job.
7046 old site posts
Save a life, adopt a senior shelter pet
1938 Master Business Coupe
1953 210 Sedan
