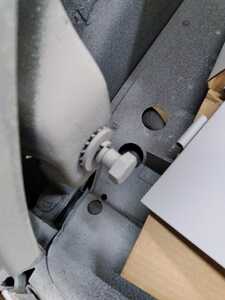
One hole is a water drain, another is for access to the head of a body bolt. I don't remember what the other one is there for?
How sweet the roar of a Chevy four
Participant on Chatter since 11/22/2001
19758 posts on the former Chatter site
Thanks Chip, hopefully someone might have a picture of one of these installed, I am going to see if I can make a pattern up.
The rear pan has a triangular stop for the rumble lid spot welded on. There are rubber bumpers that fit on the stop to keep the lid open enough for the seat cushion to angle back a little making the seat a bit more comfortable that if straight vertical. If you don't get a photo of one installed I will visit my '31 Cabriolet in the next week and could take a photo or two.
How sweet the roar of a Chevy four
Participant on Chatter since 11/22/2001
19758 posts on the former Chatter site
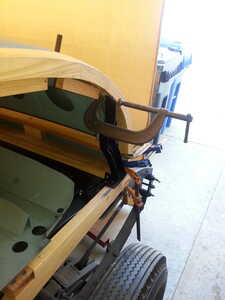
@david-dunton Thanks Dave , these pictures are a great help to me , every picture shows another piece of the puzzle , woodwork looks top notch, love those roadsters.
Just for interest sake I have included a picture of my old girl when I picked it up, someone had put Australian fenders on it , so I Imported from the States a 32 Vicky which came with spare parts I could use to make the coupe complete. That was also a little less complete then I thought but that will have to wait another day. Appears to have originally been two tone green.
This is the project so far
Thanks again,
Cheers Brian
The two larger holes (as I recall) allow access to the bolts which anchor the wood frame and metal corner bracket. My 32 restoration is completed so I can't send the pictures you need. Current project is not on a factory frame so pics may not be applicable. Looks like you are receiving some really good pics from others.
@bert-askes Thanks Bert , if anyone has pictures and or measurements of the seat frame would be a big help , I have nothing at this stage, also
if anyone knows the width of the timber ( crossmember ) behind the tool tray , I am just trying to accurately size up the floor pans,
Regards Brian


