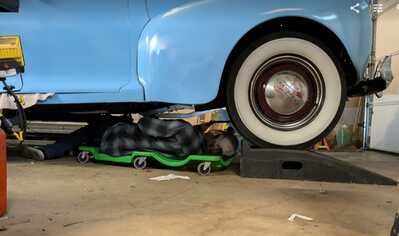
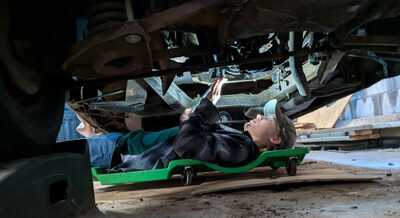
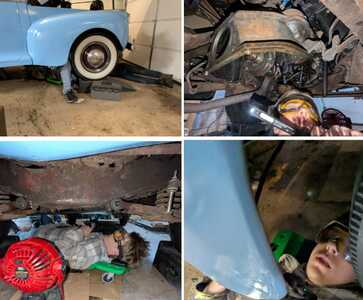
My Son is 45 now. Your posts remind me of when he was a teenager and we worked on stuff (we still do, when we are together). It is rewarding when they figure out things on their own and don't have time to wait around on "The Old Man". When they start to have better ideas than yours, to overcome a problem, you know you have done your job.
Mike
Many Miles of Happy Motoring
3469 Posts on Old VCCA Chat
My Son is 45 now. Your posts remind me of when he was a teenager and we worked on stuff (we still do, when we are together). It is rewarding when they figure out things on their own and don't have time to wait around on "The Old Man". When they start to have better ideas than yours, to overcome a problem, you know you have done your job.
Mike
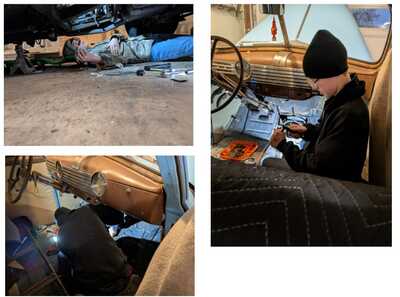
I have made a journal with pictures since the day the car arrived in our driveway. Have taken pictures when I can of what is being done. That is where I am pulling this thread from. At this point the document I have made is worth more than the car to me. One is a a result the other shows what we have done. The pictures show the kids growing over the years. Printed a copy for my aunt and parents and they loved it. There are month by month pictures of the kids growing up over the years in it. That is where the value to me is.
Hilton, New York
1941 Chevrolet Master Deluxe
1987 Monte Carlo LS
2001 Chrysler Sebring Convertible
@timothy-kruger Really enjoying reading the process here,hope you can get the car back together before winter to test drive it.
1953 Two Ten 4 door sedan
1953 Bel Air 2 door Hardtop
1968 Impala SS Convertible
This weekend was filled with a collage visit for my youngest and the chores to prepare the house for winter. I hate to say it but I think that the chance for one last drive this year is leaving quickly. It may be a drive put of the garage and down the drive way to test the clutch at this rate.
Hilton, New York
1941 Chevrolet Master Deluxe
1987 Monte Carlo LS
2001 Chrysler Sebring Convertible
November 2024
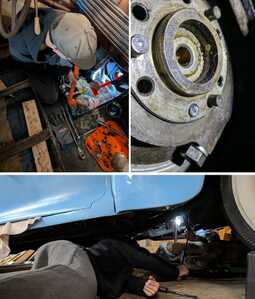
Spent time with my oldest son working on the car again. We mounted the lower bearing carrier that housed the lower portion of the rear main seal. Torqued all of the bearing carrier bolts to the proper specs. Finally we cleaned up the work area a little. Might have gotten more done but when we opened the box that we keep our hardware in we realized we did not have enough of the correct size lock washers. I do not like to reuse lock washers so off to town we went. As trips to town often go it became a while you are there trip that included a grocery run etc. And then the grocery run turned into seeing a ham on sale. Then that turned into it coming home and the smoker coming out. Needless to say, somehow working on a car became a smoked ham supper. All goals accomplished though, no complaints. Day with son and family supper together. Now we get leftovers for the week too.
Hilton, New York
1941 Chevrolet Master Deluxe
1987 Monte Carlo LS
2001 Chrysler Sebring Convertible
November 2024
........ somehow working on a car became a smoked ham supper.
That's funny right there.
7046 old site posts
Save a life, adopt a senior shelter pet
There are many good people. If you can't find one, be one.
1938 Master Business Coupe
1953 210 Sedan
December 2024
Shortly before Christmas we are back to working on the car. My youngest started cleaning off the motor where the gasket would go. Oldest started getting all of the supplies and tools lined up so the task would go smoothly. I finished cleaning the surface of the oil pan. The boys chose to replace the original slotted bolts with modern hex head ones. Their logic is this is an area others will not see and this is not a restoration. They wanted to use new hardwear when possible and hex heads are easier to get on and off with a socket. Without my help they installed the gasket and the oil pan. They even found the proper torque values for all of the bolts in the pan and did it all to spec. My main task has changed to the guy getting parts and handing out the tools. At this point I am standing back and letting them do whatever they can on it. Next step is to get the flywheel back on.
Hilton, New York
1941 Chevrolet Master Deluxe
1987 Monte Carlo LS
2001 Chrysler Sebring Convertible
Attempted to reinstall the flywheel. Everything was going smoothly. Had it properly aligned and the boys started to tighten all of the bolts. Going in a star pattern 10 ft lbs. at a time. Unfortunately one of the bolts broke off at ~40 ft lbs. They need to be installed to between 50 and 65 ft lbs. They took off the flywheel only to find that the bolt sheared close to flush with the crank. My youngest spent today attempting to get the bolt out. Still working on that task.
January 2025
We have gotten the bolt out of the crank. Yesterday my youngest was determined to get the bolt out. He drilled it and tried several types of extractors. After three hours he gave up for the night. Today I looked at it with him. Watching what he was doing and saw a mistake off the bat. He was drilling with the right bit but no lubricant on it. He burnt up the bit. Changed to a new bit of the same size and was able to drill out the bolt no issue. Then with the screw extractor it came out.
Hilton, New York
1941 Chevrolet Master Deluxe
1987 Monte Carlo LS
2001 Chrysler Sebring Convertible
Yesterday we installed the clutch, almost. The boys worked together and installed the clutch and clutch cover. We prepared the throwout bearing and fork to install into the car. Unfortunately as luck would have it the little clip that holds the clutch fork to the ball stud in the bell housing has gone to the magical location that all the springs and snaprings go when they are removed. We are currently waiting on a new one to arrive in the mail from the Filling Station.
Hilton, New York
1941 Chevrolet Master Deluxe
1987 Monte Carlo LS
2001 Chrysler Sebring Convertible
Yes those "angel clips" often leave the field only to be found after the replacement has been fitted, dont ask me how I know.
Tony
The little spring arrived. Installed it into the shift fork and my oldest installed it back into the car. Took a little more force than expected to get the fork to snap over the ball. The new throw-out bearing is in place. Also adjusted the pedal and linkage per the repair manual.
Hilton, New York
1941 Chevrolet Master Deluxe
1987 Monte Carlo LS
2001 Chrysler Sebring Convertible
February 2025
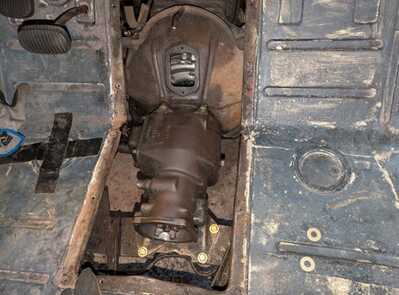
Attempted to place the transmission in the car and it would not fit. Could not line it up to get it in the car. No matter what we did the tail of the transmission was to high to fit through the throw out bearing. Finally we decided that we needed to disconnect the shift linkage (again) to be able to get the angle needed to insert the transmission. This seemed to help. we could get it into what seemed to be the correct spot. Things were not lining up. Then we realized that the alignment tool had at some point been pulled out and not fully reinserted, the clutch disk and the pilot hole were no longer aligned.
March 2025
Now with nothing lining up it was time to remove the clutch cover and correct our errors. All part of the learning process. My youngest took out the bolts for the clutch cover and then both boys re-aligned everything.
With the clutch back together and everything aligned it was time to put the transmission in. Once again it would not fit, the rear of it was hitting the frame and it would not line up. So we removed the clutch for to see if that would allow us to get a better angle. It did allow for a better angle but not enough to allow the transmission to be mounted.
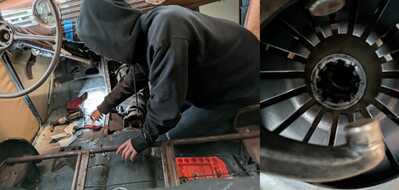
After watching multiple videos on YouTube we finally noticed that in the pictures the transmissions coming out of cars had the studs on the bottom but one going in did not, just holes where the studs were. None of the service manuals or videos mentioned this. We decided to take out the studs. One came out in a few minutes. Then two hours later the other came out. At this point we spent some time cleaning all of the studs and bolt holes so that everything would easily go back together. Next attempt and it lined right up and slid in. The boys carefully maneuvered it in place and everything bolted up. The studs on the bottom kept hitting the frame and this whole time we never thought they were removable till re-watching Jayhawker videos on YouTube for the tenth time.
Next challenge was to get the transmission mount on. We thought it would simply slide in, nope. Go to slide it in place and there is not enough clearance to slip it in. So we place the jack under the tranny and start to lift it. We were very nervous about going too far with it but it worked. Had to raise it about ½ - ¾ inch. I it slipped in, reinstalled the studs in the transmission and it was all set. Finally had success. It was getting late and we decided it was a good time for super. Next steps will be to get the clutch and shift linkage hooked back up and to re-attach the torque tube. We are looking forward to driving this again.
Hilton, New York
1941 Chevrolet Master Deluxe
1987 Monte Carlo LS
2001 Chrysler Sebring Convertible
April 2025
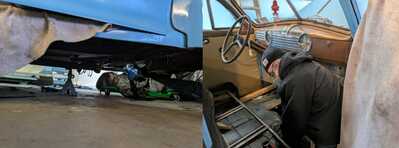
Finally the torque tube is once again connected. Went through the car and verified all of the bolts we touched are properly tightened. Readjusted the clutch pedal to have the proper travel. My oldest son put the floor cover back in and my youngest got out the grease gun and filled all of the grease fittings. Only things left on the list to get it started again is to double check the normal yearly list for under the hood (oil starter, generator, check belt etc.). Also need to put the front seat and carpet back in. Hopefully everything starts up and runs.
Hilton, New York
1941 Chevrolet Master Deluxe
1987 Monte Carlo LS
2001 Chrysler Sebring Convertible
May 2025
Saturday fired it up for the first time since last October. In under 30 seconds it fired with 1/2 choke just like always, sounded smooth, smiled everywhere, and then it gushed oil from between the crank and the flywheel. Oil was coming out fast. Ran it for less than 30 seconds and shut it all down. Started it a second time to verify where it was coming from and it is from the rear of the motor. Good news was everything sounded real good, no odd noises. It sounded smooth. Gages said it was charging etc. Unfortunately we are now trying to figure out what went wrong. We ordered the oil pan gasket and a rear main seal so when we get into it we have the parts. Will know more once things are opened up. We had to step away Saturday after seeing that. One time it is better to step back and take time to think.
Hilton, New York
1941 Chevrolet Master Deluxe
1987 Monte Carlo LS
2001 Chrysler Sebring Convertible
Congrats and condolences! At least no funny noises from the engine!
Dean
Dean "Rustoholic" Meltz
San Leandro, CA
3511 posts on vccachat.org
Lurch -1927 LM one ton truck - tinyurl.com/Lurch-VCCACHAT-Gallery
Justin - 1928 AB Canopy Express (1/2 ton truck) - tinyurl.com/Justin-Stovebolt-Gallery
