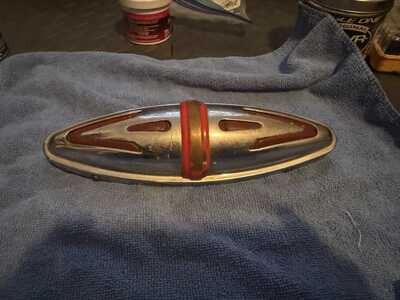
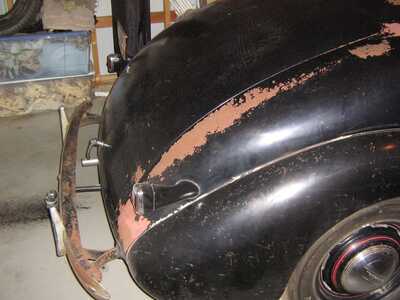
A few years back Tiny posted good instructions with images of his fender lamp installation. Could you please repost for the new folks and the ones who forgot. A few years back I bought a set of fender lamps for my first 38 Master deluxe , I sold the 38 but kept the lights. I am ready install on my 38 Master sedan this time but scared to put in wrong place. I've seen some bad installs and I don't want or be numbered amongst them
Thank you
Mike
38 Master sedan
<CLICK> <CLICK> <Scroll to my first post in this thread> I think I still have the printed instructions Gene sent me years ago but they're on my other computer so it'll be a couple of days before I can post them.
7046 old site posts
Save a life, adopt a senior shelter pet
There are many good people. If you can't find one, be one.
1938 Master Business Coupe
1953 210 Sedan
Thanks Tiny as usual
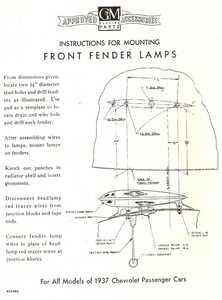
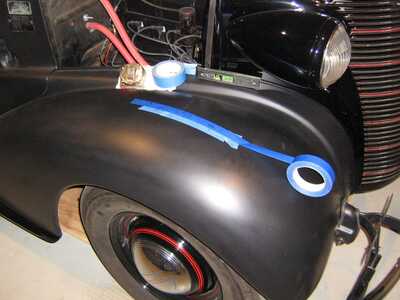
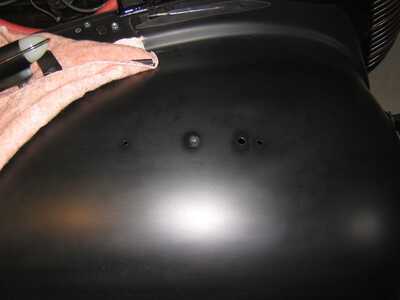
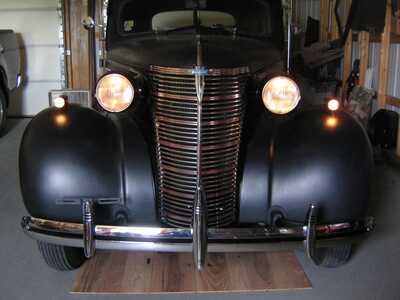
Here's the installation instructions sent to me by Gene years ago. The measurements are hard to read. They are in odd fractions of an inch rather then decimal. I laid mine out using a torpedo level, making them level side to side and forward to aft AND making sure they point straight forward instead of following the line of the fender. If you follow the line of the fender the lights will point inward. I removed the top cover of the light so I had a flat surface to rest the level on. I used blue painter tape to make the marks on before drilling. FWI, there is an existing hole in the inner fender with a knockout plug that should line up with the under fender bracket wire support. <That's the channel part of these brackets> If the channel isn't lined up with the knockout hole for the wire you're not lined up correctly. The purpose of the bracket is two fold, one to reinforce the holes and two, to hold the wire up away from the tire.
7046 old site posts
Save a life, adopt a senior shelter pet
There are many good people. If you can't find one, be one.
1938 Master Business Coupe
1953 210 Sedan
excellent, thank you again Tiny. I am ready to install this time around. Drilling holes in fender makes me nervous so I don’t want to make a mistake if possible. Only thing I might do is change wire for fabric coated type or at least vintage looking conductor versus teflon coated even though it’s under fender
I don't know why this seems complicated to me, I suck at math and geometry. Your lights look perfect. Do the measurements to the fender side edges indicate that you are in the correct position fore and aft and side to side once you meet those values for the studs and the punch out hole will verify you are close. Is it best to use the rubber pad as a template for measurements from the center of the stud holes or are the studs removable for installation purposes(haven't looked at lamps in years? Seems like lots of room for error which I can be prone to. So much space side to side and fore and aft plus the lights not matching the angle of the headlight is a fatal error having seen that on some 37-39's.
@michael-alvarez I didn't have those measurements when I laid it out and drilled the holes. As I mentioned, I used a level to level them side to side and forward to aft & pointed them straight ahead. I positioned them in the center of the fender crown side to side. To get them level forward to aft I had to go forward of the fender crown, which ended up matching the factory instructions. When I got the instructions from Gene and compared the factory measurements to what I'd done, they were very close. If you choose to do the same, put painters tape on the fender to protect the paint while you get your positioning down and remove the top cover so the level sits on the level center line of the light housing. As long as they're level front to back and side to side and pointing straight ahead you'll be OK.
7046 old site posts
Save a life, adopt a senior shelter pet
There are many good people. If you can't find one, be one.
1938 Master Business Coupe
1953 210 Sedan
@tiny That's even more impressive in my opinion, I could use every reference possible before drilling a single hole in my fender. I am going to order vintage style wire to replace modern wire before install. Much to do but will install parking lamps this time
I didn't realize the installation instructions actually say to wire parking lamps in place of parking lights in headlight assembly.
That's the factory recommendation. I wired mine to work with my low beams to act as running lights.
7046 old site posts
Save a life, adopt a senior shelter pet
There are many good people. If you can't find one, be one.
1938 Master Business Coupe
1953 210 Sedan
If I ever get the nerve to actually drill my fenders, that is what I want as well follow Chip I think and use fog lights as turn signals. I recently received a directional light fixture with left and right arrows that will go in my back window. I hope the arrows are bright enough and I received a set of 3.5” diameter chrome lights with red lenses to be mounted to my passenger bumper brace as a passenger taillight
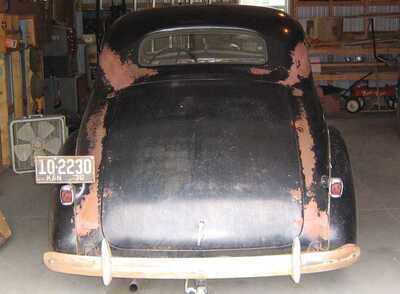
The Filling Station sells the arms and housings that replicate the OEM parts accurately for a RH light. Below shows my 38 after installing them prior to restoration of the car.
7046 old site posts
Save a life, adopt a senior shelter pet
There are many good people. If you can't find one, be one.
1938 Master Business Coupe
1953 210 Sedan
I have a passenger light assembly but prefer the original single taillight, I think it is unique these days
I have a passenger light assembly but prefer the original single taillight, I think it is unique these days
I understand. I removed my RH light during the restoration and drove it that way for several years. I bought a bicycle tail light that flashes and put a strong magnet on it to stick to my bumper on the RH side when I had to drive at night. I eventually went back to the stock form RH tail light. I did, for safety, mount a package shelf STOP light, that is removable, after I removed the RH light.
7046 old site posts
Save a life, adopt a senior shelter pet
There are many good people. If you can't find one, be one.
1938 Master Business Coupe
1953 210 Sedan


