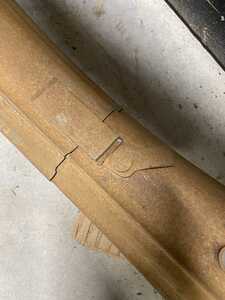
Sorry. I clicked the reply button before adding one more picture
This shows the split and locking system for the demountable, straight side style rim. To mount this tire, the lock is released so that the ends of the rim can overlap. A special tool is used to pull the rim together, making it smaller for mounting. The same tool then acts in reverse to expand the rim back to where it can be locked.
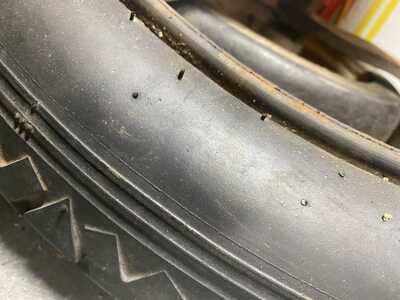
Back to the clincher for a bit. The clincher tire cross section has protruding beads that hook under the "C" shaped rim. Here is a picture of a clincher tire bead. I hope this makes sense and in some small way will atone for my previous lack of sensitivity with regard to spelling Down Under.
Many Miles of Happy Motoring
3469 Posts on Old VCCA Chat
@35mike Thanks again Mike.
The photos and explanation really help.
One final question then. Do you know if there is anyway to fit an alternative rim and tire to the old Chevy's that would allow them to be easily moved around in a workshop etc instead of using the old original rims and tires? With the original rims and tires being so specialized and expensive I am wondering whether I can find something that would allow me to keep them aside until the rest of the work is done on the rebuild.
Thanks
@737thedon Don, If you have a smooth concrete floor, I would not worry about rolling them around on the wheels with the rims/tires removed. The metal ring that retains the spokes at the outer end is called the felloe. These are usually strong enough for normal movement on a smooth shop floor. Plus... much less resistance that a rubber tire
Mike
Many Miles of Happy Motoring
3469 Posts on Old VCCA Chat


